mirror of
https://github.com/jerryc127/hexo-theme-butterfly.git
synced 2026-04-16 20:30:53 +08:00
1260 lines
32 KiB
Markdown
1260 lines
32 KiB
Markdown
# 快速開始
|
||
|
||
`hexo-theme-butterfly`是基於[Molunerfinn](https://github.com/Molunerfinn)的[hexo-theme-melody](https://github.com/Molunerfinn/hexo-theme-melody)的基礎上進行開發的。
|
||
文檔也是在[hexo-theme-melody](https://molunerfinn.com/hexo-theme-melody-doc/)的文檔基礎上修改。因為一些配置變更導致與原主題配置上有部分區別。故如果安裝`hexo-theme-butterfly`主題,請參考這篇文檔。
|
||
|
||
## 主題安裝和升級
|
||
|
||
### 安裝
|
||
|
||
在你的博客根目錄裏
|
||
|
||
```
|
||
git clone -b master https://github.com/jerryc127/hexo-theme-butterfly.git themes/Butterfly
|
||
```
|
||
|
||
如果想要安裝比較新的dev分支,可以
|
||
|
||
```
|
||
git clone -b div https://github.com/jerryc127/hexo-theme-butterfly.git themes/Butterfly
|
||
```
|
||
|
||
### 應用主題
|
||
|
||
修改站點配置文件`_config.yml`,把主題改為`Butterfly`
|
||
|
||
```yaml
|
||
theme: Butterfly
|
||
```
|
||
|
||
> 如果你沒有 pug 以及 stylus 的渲染器,請下載安裝: `npm install hexo-renderer-jade hexo-renderer-stylus --save` or `yarn add hexo-renderer-jade hexo-renderer-stylus`
|
||
|
||
### 平滑升級
|
||
|
||
為了主題的平滑升級, `Butterfly` 使用了 [data files](https://hexo.io/docs/data-files.html)特性。
|
||
|
||
推薦把主題默認的配置文件`_config.yml`複製到 Hexo 工作目錄下的`source/_data/butterfly.yml`,如果`source/_data`的目錄不存在那就創建一個。
|
||
|
||
> 注意,如果你創建了`butterfly.yml`, 它將會替換主題默認配置文件`_config.yml`裏的配置項 (**不是合併而是替換**), 之後你就只需要通過`git pull`的方式就可以平滑地升級 `theme-melody`了。
|
||
|
||
# 配置
|
||
|
||
## 配置文件説明
|
||
|
||
- 站點配置文件`_config.yml`是 hexo 工作目錄下的主配置文件
|
||
- `butterfly.yml` 是 `Butterfly` 的配置文件。它需要你手動將主題目錄下的`_config.yml`文件複製到 hexo 工作目錄的`source/_data/butterfly.yml`中。如果文件或者文件夾不存在,需要手動創建。
|
||
|
||
## 語言
|
||
|
||
修改站點配置文件 `_config.yml`
|
||
|
||
默認語言是 en
|
||
|
||
主題支持三種語言
|
||
|
||
- default(en)
|
||
- zh-CN (簡體中文)
|
||
- zh-TW (繁體中文)
|
||
|
||
## 自定義主題色
|
||
|
||
可以修改大部分UI顏色
|
||
|
||
配置`butterfly.yml`,比如:
|
||
|
||
>顏色值必須被雙引號包裹,就像`"#000"`而不是`#000`。否則將會在構建的時候報錯!
|
||
|
||
```yaml
|
||
theme_color:
|
||
enable: true
|
||
main: "#9370DB"
|
||
paginator: "#7A7FF1"
|
||
button_hover: "#FF7242"
|
||
text_selection: "#69c46d"
|
||
link_color: "#858585"
|
||
hr_color: "#A4D8FA"
|
||
read-mode-bg_color: '#FAF9DE'
|
||
```
|
||
|
||
|
||

|
||
|
||
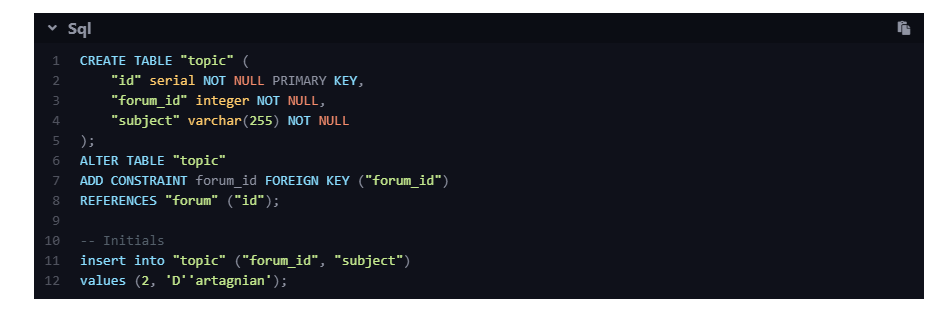
## 代碼高亮主題
|
||
|
||
`Butterfly` 支持了 [Material Theme](https://github.com/equinusocio/material-theme)全部 5 種代碼高亮樣式:
|
||
|
||
- default
|
||
- darker
|
||
- pale night
|
||
- light
|
||
- ocean
|
||
|
||
配置`butterfly.yml`
|
||
|
||
```yaml
|
||
highlight_theme: light
|
||
```
|
||
|
||
> default
|
||
|
||
|
||
|
||
> darker
|
||
|
||
|
||
|
||
> pale night
|
||
|
||
|
||
|
||
> light
|
||
|
||
|
||
|
||
> ocean
|
||
|
||
|
||
|
||
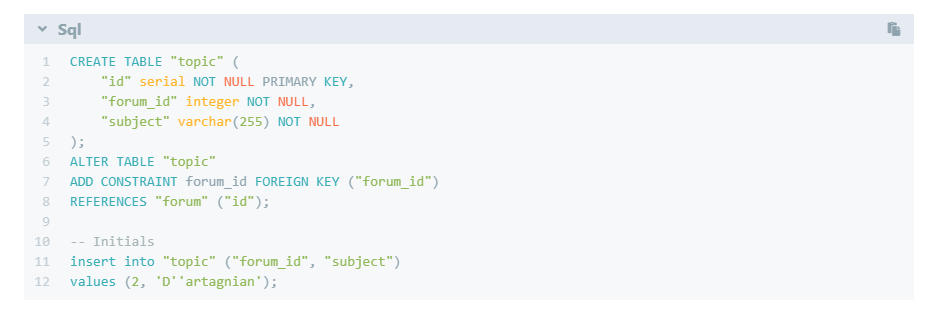
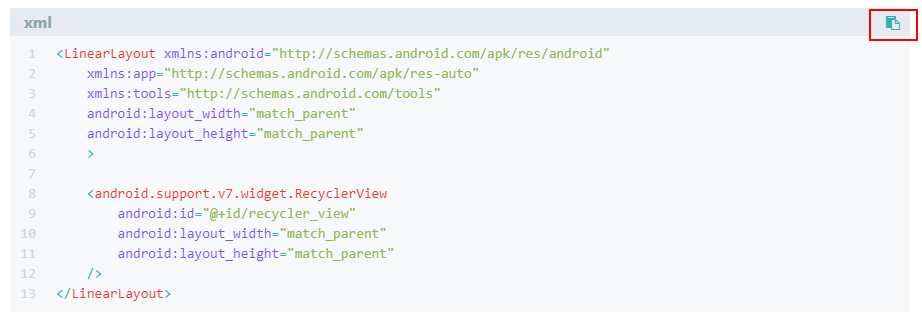
## 代碼複製
|
||
|
||
主題支持代碼複製功能
|
||
|
||
配置`butterfly.yml`
|
||
|
||
```yaml
|
||
highlight_copy: true
|
||
```
|
||
|
||
|
||
|
||
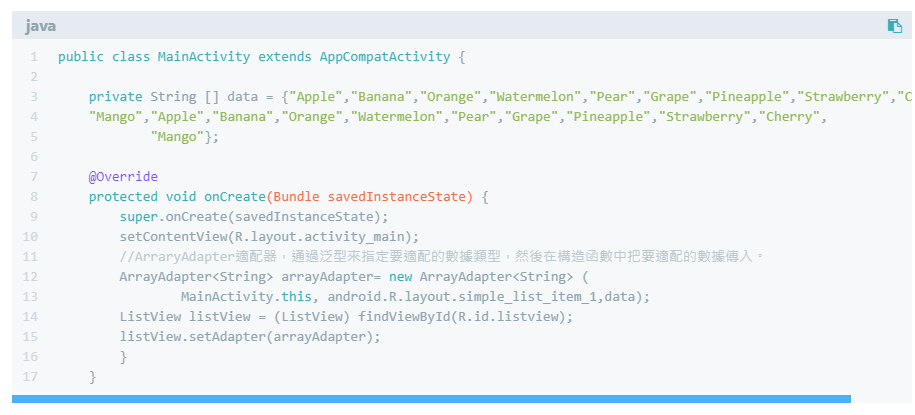
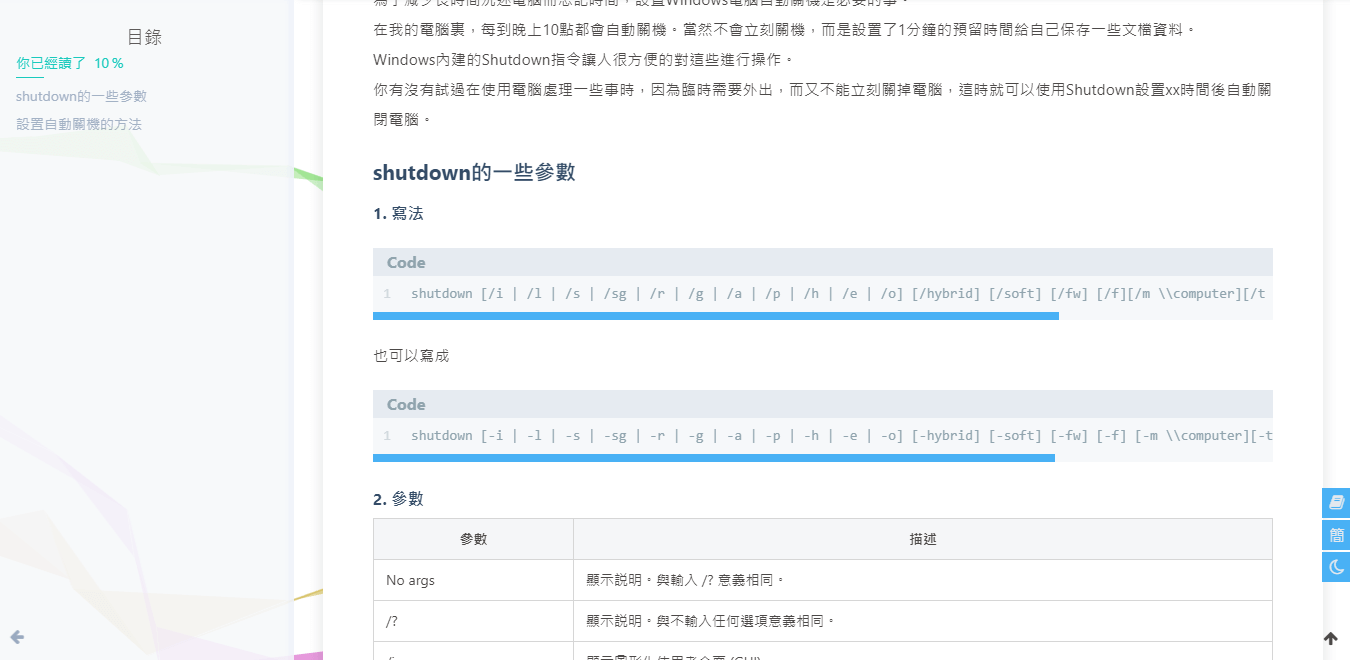
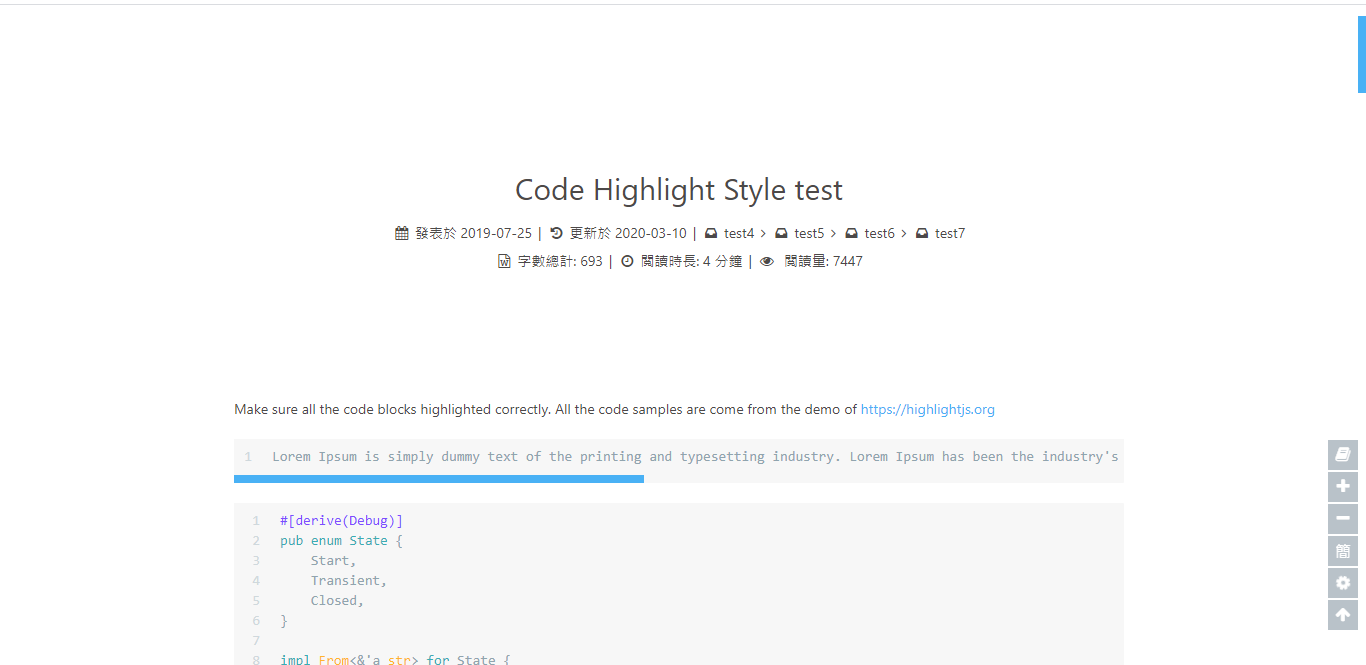
## 代碼換行
|
||
|
||
在默認情況下,`hexo-highlight`在編譯的時候不會實現代碼自動換行。如果你不希望在代碼塊的區域裏有橫向滾動條的話,那麼你可以考慮開啟這個功能。
|
||
|
||
配置`butterfly.yml`
|
||
|
||
```yaml
|
||
code_word_wrap: true
|
||
```
|
||
|
||
然後找到你站點的 Hexo 配置文件`_config.yml`,將`line_number`改成`false`:
|
||
|
||
```yaml
|
||
highlight:
|
||
enable: true
|
||
line_number: false
|
||
auto_detect: false
|
||
tab_replace:
|
||
```
|
||
|
||
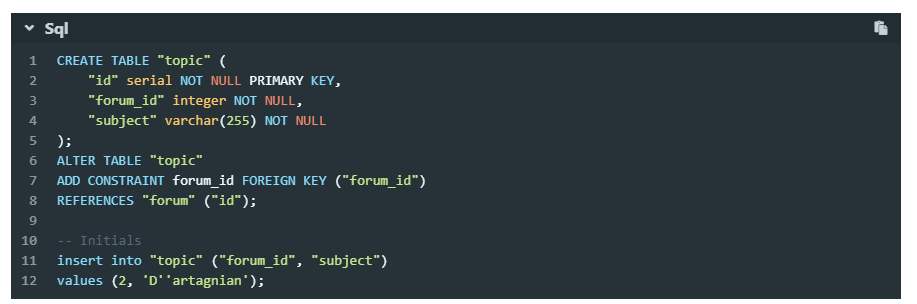
> 設置`code_word_wrap`之前:
|
||
|
||
|
||
|
||
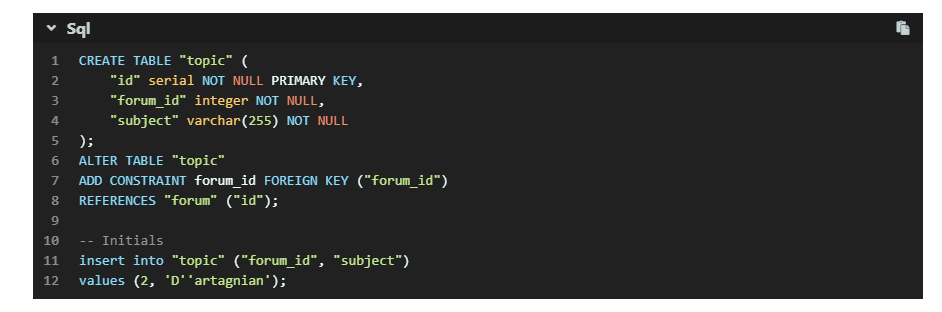
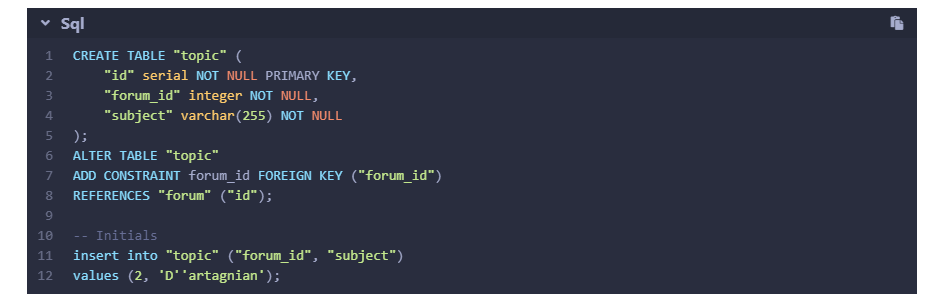
> 設置`code_word_wrap`之後:
|
||
|
||

|
||
|
||
## 社交圖標
|
||
|
||
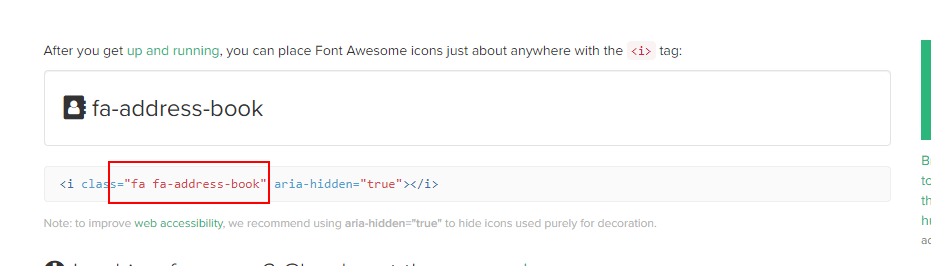
Butterfly支持 [font-awesome v4](https://fontawesome.com/v4.7.0/)和 [font-awesome v5](https://fontawesome.com/icons?from=io). 如需開啟[font-awesome v5](https://fontawesome.com/icons?from=io),需要在`Butterfly.yml`上開啟
|
||
|
||
```yaml
|
||
cdn:
|
||
css:
|
||
fontawesome: https://cdn.jsdelivr.net/npm/font-awesome@latest/css/font-awesome.min.css
|
||
fontawesomeV5: https://use.fontawesome.com/releases/v5.8.1/css/all.css
|
||
```
|
||
|
||
無論V4還是V5,書寫格式都是一樣的`圖標名:url`
|
||
|
||
```yaml
|
||
social:
|
||
fa fa-github: https://github.com/jerryc127
|
||
fa fa-rss: /atom.xml
|
||
```
|
||
|
||
圖標名可在這尋找
|
||
|
||
|
||
|
||
PC:
|
||
|
||
|
||
|
||
Mobile:
|
||
|
||

|
||
|
||
## 導航菜單
|
||
|
||
配置`butterfly.yml`
|
||
|
||
```yaml
|
||
menu:
|
||
首頁: /||fa fa-home
|
||
時間軸: /archives/||fa fa-archive
|
||
標籤: /tags/||fa fa-tags
|
||
分類: /categories/||fa fa-folder-open
|
||
留言板: /messageboard/||fa fa-coffee
|
||
友鏈: /link/||fa fa-link
|
||
關於: /about/||fa fa-heart
|
||
```
|
||
|
||
> 必須是 `/xxx/`,後面`||`分開,然後寫圖標名。菜單名稱可自己修改。
|
||
|
||

|
||
|
||
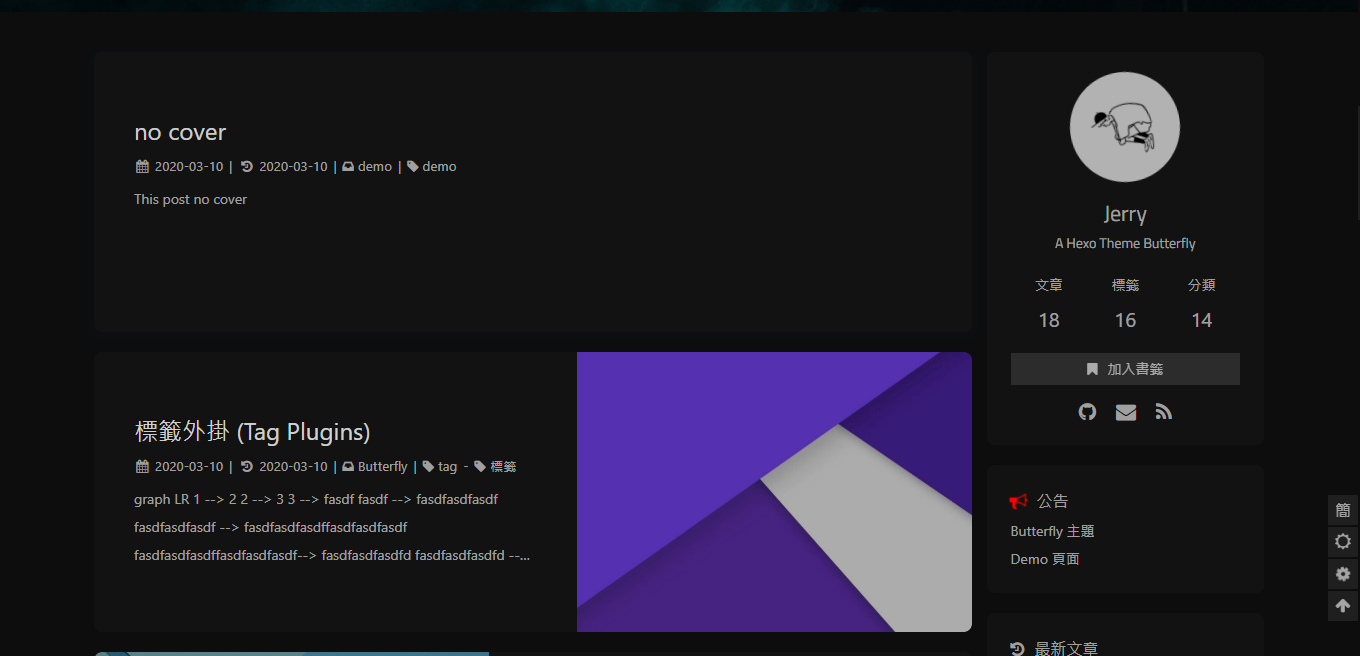
## 主頁文章節選(自動節選和文章頁description)
|
||
|
||
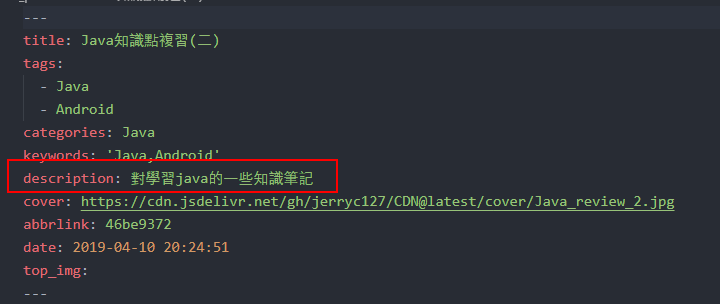
因為主題UI的關係,`主頁文章節選`只支持`自動節選`和`文章頁description`。優先選擇`自動節選`。
|
||
|
||
在`butterfly.yml`裏可以開啟`auto_excerpt`的選項,你的文章將會在自動截取部分顯示在主頁。(默認顯示150個字)。
|
||
|
||
```yaml
|
||
auto_excerpt:
|
||
enable: true
|
||
length: 150
|
||
```
|
||
|
||
如果沒有開啟`自動節選`,則會顯示文章頁front-matter裏面設置的`description`。
|
||
|
||
|
||
|
||
> 注意:如果開啟了自動節選功能,代碼塊的顯示將有可能不正常。
|
||
|
||
## 頂部圖
|
||
|
||
`頂部圖`有2種配置:具體url 和(留空,true和false,三個效果一樣)
|
||
|
||
### page頁
|
||
|
||
#### 當具體url時
|
||
|
||
主頁的頂部圖可以在`Butterfly.yml`設置`top_img`
|
||
|
||
archives頁的頂部圖可以在`Butterfly.yml`設置`archive_img`
|
||
|
||
其他`page`頁的頂部圖可以在各自的md頁面設置`front-matter`中的`top_img`
|
||
|
||
> 除`主頁`外,其他頁面如果沒有設置各自的`top_img`,則會顯示與主頁同樣的`top_img`圖片
|
||
|
||
#### 當頂部圖留空,true和false
|
||
|
||
主頁會顯示純顏色的頂部圖
|
||
|
||
其他page的頂部圖沒有設置時,也會顯示純顏色的頂部圖
|
||
|
||
### post頁
|
||
|
||
`post`頁的頂部圖會優先顯示各自`front-matter`中的`top_img`,如果沒有設置,則會縮略圖(即各自``front-matter`中的`cover`),如果沒有則會顯示默認的post頂部圖,可在`Butterfly.yml`設置`post_img`
|
||
|
||
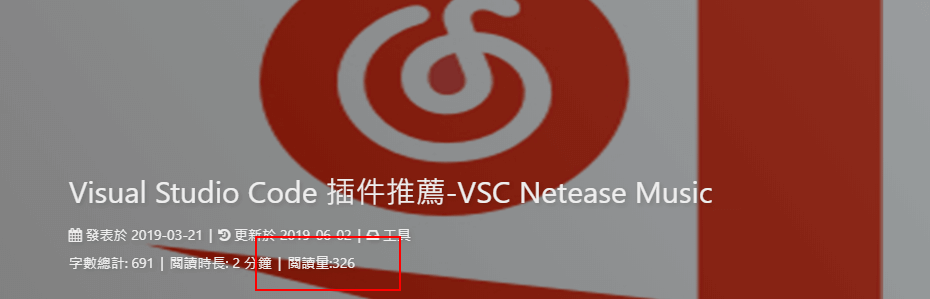
## 文章相關項
|
||
|
||
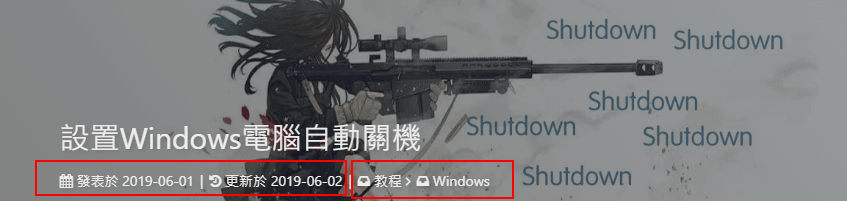
這個選項是用來顯示文章的相關信息的。
|
||
|
||
配置`butterfly.yml`
|
||
|
||
```yaml
|
||
post_meta:
|
||
date_type: both #or created or updated 文章日期是創建日或者更新日或都顯示
|
||
categories: true # or false 是否顯示分類
|
||
tags: true # or false 是否顯示標籤
|
||
```
|
||
|
||
在文章頂部的資料,
|
||
|
||
`date_type`: 可設置文章日期顯示創建日期(`created`)或者更新日期(`updated`)或者兩種都顯示(`both`)
|
||
|
||
`categories` 是否顯示分類
|
||
|
||
|
||
|
||
`tags`是否顯示標籤
|
||
|
||
|
||
|
||
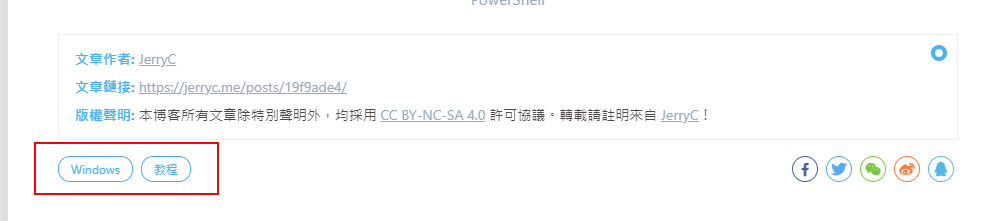
## 文章版權
|
||
|
||
為你的博客文章展示文章版權和許可協議。
|
||
|
||
配置`butterfly.yml`
|
||
|
||
```yaml
|
||
post_copyright:
|
||
enable: true
|
||
license: CC BY-NC-SA 4.0
|
||
license_url: https://creativecommons.org/licenses/by-nc-sa/4.0/
|
||
```
|
||
|
||

|
||
|
||
## 文章打賞
|
||
|
||
在你每篇文章的結尾,可以添加打賞按鈕。相關二維碼可以自行配置
|
||
|
||
配置`butterfly.yml`
|
||
|
||
```yaml
|
||
reward:
|
||
enable: true
|
||
QR_code:
|
||
- itemlist:
|
||
img: /img/wechat.jpg
|
||
text: 微信
|
||
- itemlist:
|
||
img: /img/alipay.jpg
|
||
text: 支付寶
|
||
```
|
||
|
||

|
||
|
||
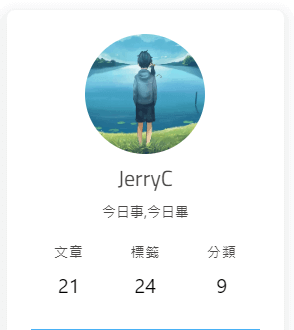
## 頭像
|
||
|
||
配置`butterfly.yml`
|
||
|
||
```yaml
|
||
avatar: https://xxxx/avatar.png
|
||
```
|
||
|
||
|
||
|
||
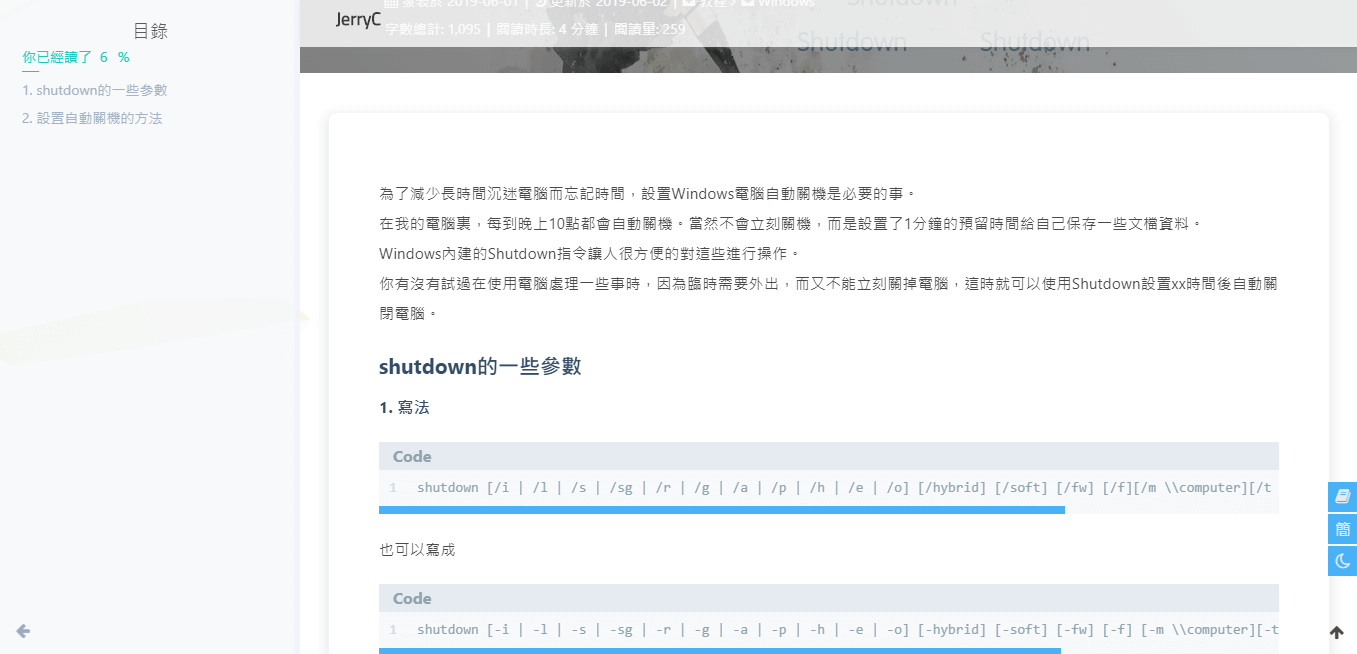
## TOC
|
||
|
||
在文章頁,會有一個目錄,用於顯示TOC
|
||
|
||
配置`butterfly.yml`
|
||
|
||
```yaml
|
||
toc:
|
||
enable: true
|
||
number: true #顯示章節數字
|
||
```
|
||
|
||
### 為特定的文章配置是否顯示TOC和特定的目錄章節數字
|
||
|
||
在你的文章`md`文件的頭部,加入`toc_number`和`toc`項,並配置`true`或者`false`即可。
|
||
|
||
`toc`是否顯示文章TOC
|
||
|
||
`toc_number` 是否顯示章節數
|
||
|
||
配置之後你的特定的文章將會擁有它自己的目錄數字的顯示與否,而不會受全局的配置影響。
|
||
|
||
> `enable: true`
|
||
|
||
|
||
|
||
> `number: false`
|
||
|
||
|
||
|
||
### 設置是否自動打開TOC
|
||
|
||
可選擇進入文章頁面時,是否自動打開sidebar顯示TOC
|
||
|
||
```YAML
|
||
auto_open_sidebar:
|
||
enable: true
|
||
```
|
||
|
||
## 博客年份
|
||
|
||
`since`是一個來展示你站點起始時間的選項。它位於頁面的最底部。
|
||
|
||
配置`butterfly.yml`
|
||
|
||
```yaml
|
||
since: 2018
|
||
```
|
||
|
||

|
||
|
||
## 頁腳自定義文本
|
||
|
||
`footer_custom_text`是一個給你用來在頁腳自定義文本的選項。通常你可以在這裏寫聲明文本等。支持 HTML。
|
||
|
||
配置`butterfly.yml`
|
||
|
||
```yaml
|
||
footer_custom_text: Hi, welcome to my <a href="https://jerryc.me/">blog</a>!
|
||
```
|
||
|
||

|
||
|
||
## ICP
|
||
|
||
對於部分有備案的域名,可以在ICP配置顯示。
|
||
|
||
配置`butterfly.yml`
|
||
|
||
```yaml
|
||
ICP:
|
||
enable: true
|
||
url: http://www.beian.miit.gov.cn/state/outPortal/loginPortal.action
|
||
text: 粵ICP備xxxx
|
||
```
|
||
|
||
## 夜間模式
|
||
|
||
右下角會有夜間模式按鈕
|
||
|
||
配置`butterfly.yml`
|
||
|
||
```yaml
|
||
nightshift:
|
||
enable: true
|
||
```
|
||
|
||
|
||
|
||
## 閲讀模式
|
||
|
||
閲讀模式下會去掉除文章外的內容,避免幹擾閲讀。
|
||
|
||
只會出現在文章頁面,右下角會有閲讀模式按鈕。
|
||
|
||
配置`butterfly.yml`
|
||
|
||
```yaml
|
||
readmode:
|
||
enable: true
|
||
```
|
||
|
||
|
||
|
||
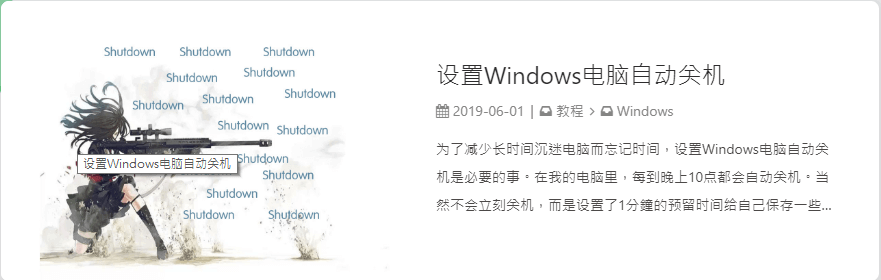
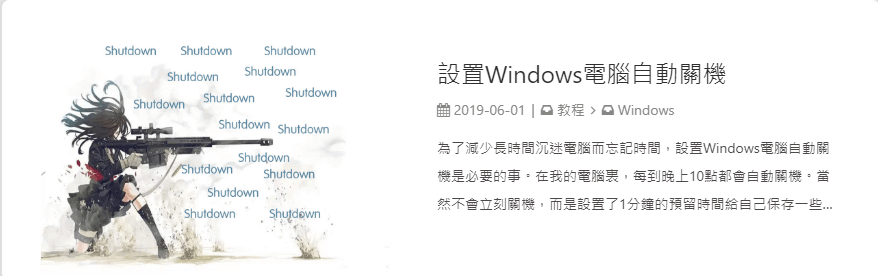
## 簡繁轉換
|
||
|
||
簡體繁體互換
|
||
|
||
右下角會有簡繁轉換按鈕。
|
||
|
||
配置`butterfly.yml`
|
||
|
||
```yaml
|
||
translate:
|
||
enable: true
|
||
# 默認按鈕顯示文字(網站是簡體,應設置為'default: 繁')
|
||
default: 簡
|
||
#網站默認語言,1: 繁體中文, 2: 簡體中文
|
||
defaultEncoding: 1
|
||
#延遲時間,若不在前, 要設定延遲翻譯時間, 如100表示100ms,默認為0
|
||
translateDelay: 0
|
||
#博客網址
|
||
cookieDomain: "https://jerryc.me/"
|
||
#當文字是簡體時,按鈕顯示的文字
|
||
msgToTraditionalChinese: "繁"
|
||
#當文字是繁體時,按鈕顯示的文字
|
||
msgToSimplifiedChinese: "簡"
|
||
```
|
||
|
||
> 簡體
|
||
|
||
|
||
|
||
> 繁體
|
||
|
||
|
||
|
||
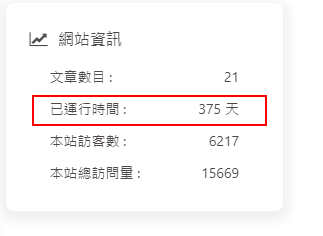
## 運行時間
|
||
|
||
網頁已運行時間
|
||
|
||
配置`butterfly.yml`
|
||
|
||
```yaml
|
||
runtimeshow:
|
||
enable: true
|
||
start_date: 6/7/2018 00:00:00 ##網頁開通時間
|
||
```
|
||
|
||
|
||
|
||
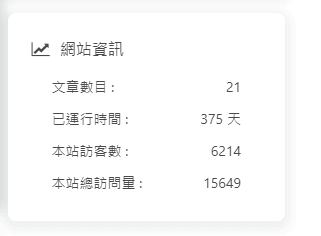
## 側邊排版
|
||
|
||
可自行決定哪個項目需要顯示
|
||
|
||
> 至少需要顯示一個
|
||
|
||
配置`butterfly.yml`
|
||
|
||
```yaml
|
||
aside:
|
||
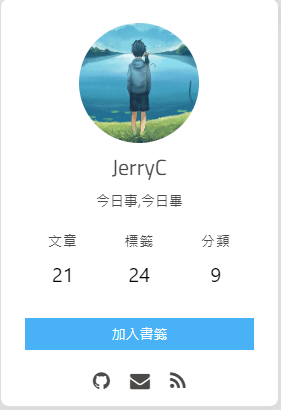
card_author: true
|
||
card_announcement: true
|
||
card_recent_post: true
|
||
card_categories: true
|
||
card_tags: true
|
||
card_archives: true
|
||
card_webinfo: true
|
||
```
|
||
|
||
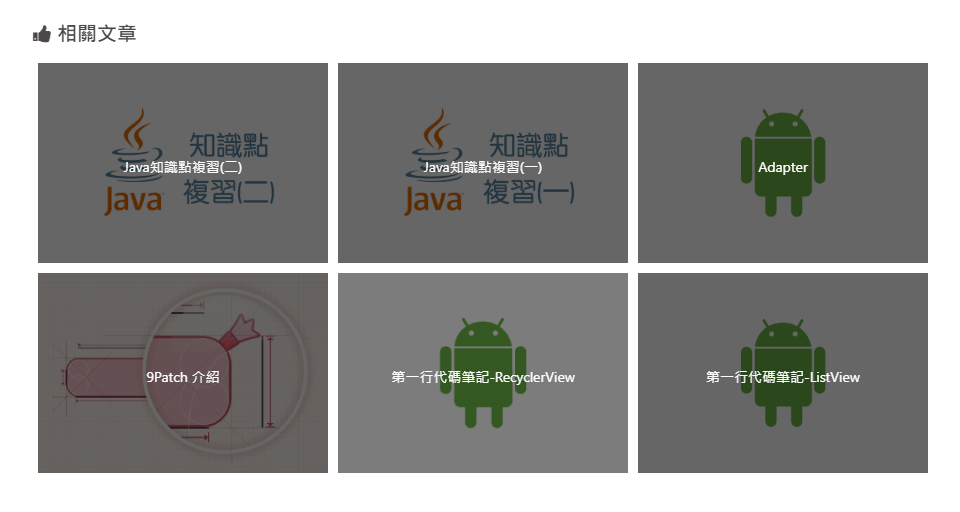
## 相關文章
|
||
|
||
相關文章推薦的原理是根據文章tags的比重來推薦
|
||
|
||
配置`butterfly.yml`
|
||
|
||
```yaml
|
||
related_post:
|
||
enable: true
|
||
limit: 6 # 顯示推薦文章數目
|
||
```
|
||
|
||
|
||
|
||
## 自定義字體
|
||
|
||
可自行設置字體的`font-family`
|
||
|
||
配置`butterfly.yml`
|
||
|
||
```yaml
|
||
font:
|
||
enable: true
|
||
font-family: Lato, Helvetica Neue For Number, -apple-system, BlinkMacSystemFont, Segoe UI, Roboto, PingFang SC, Hiragino Sans GB,"Microsoft JhengHei", "MicrMicrosoft YaHei", Helvetica Neue, Helvetica, Arial, sans-serif
|
||
code-font: consolas, Menlo, "PingFang SC", "Microsoft JhengHei","Microsoft YaHei", monospace, Helvetica Neue For Number
|
||
```
|
||
|
||
## 網站副標題
|
||
|
||
可設置主頁中顯示的網站副標題或者喜歡的座右銘。
|
||
|
||
配置`butterfly.yml`
|
||
|
||
```yaml
|
||
subtitle:
|
||
enable: true
|
||
sub1: 今日事,今日畢
|
||
sub2: Never put off till tomorrow what you can do today
|
||
```
|
||
|
||

|
||
|
||
# 主題頁面
|
||
|
||
## Page Front-matter
|
||
|
||
```markdown
|
||
---
|
||
title:
|
||
date:
|
||
type: (tags,link,categories這三個頁面需要配置)
|
||
comments: (是否需要顯示評論,默認true)
|
||
description:
|
||
top_img: (設置頂部圖)
|
||
---
|
||
```
|
||
|
||
## Post Front-matter
|
||
|
||
```markdown
|
||
---
|
||
title:
|
||
date:
|
||
tags:
|
||
categories:
|
||
keywords:
|
||
description:
|
||
top_img: (除非特定需要,可以不寫)
|
||
comments 是否顯示評論(除非設置false,可以不寫)
|
||
cover: 縮略圖
|
||
toc: 是否顯示toc (除非特定文章設置,可以不寫)
|
||
toc_number: 是否顯示toc數字 (除非特定文章設置,可以不寫)
|
||
---
|
||
```
|
||
|
||
## 標籤頁
|
||
|
||
1. 前往你的 Hexo 博客的根目錄
|
||
|
||
2. 輸入`hexo new page tags`
|
||
|
||
3. 你會找到`source/tags/index.md`這個文件
|
||
|
||
4. 修改這個文件:
|
||
|
||
```markdown
|
||
---
|
||
title: 標籤
|
||
date: 2018-01-05 00:00:00
|
||
type: "tags"
|
||
---
|
||
```
|
||
|
||
## 分類頁
|
||
|
||
1. 前往你的 Hexo 博客的根目錄
|
||
|
||
2. 輸入`hexo new page categories`
|
||
|
||
3. 你會找到`source/categories/index.md`這個文件
|
||
|
||
4. 修改這個文件:
|
||
|
||
```markdown
|
||
---
|
||
title: 分類
|
||
date: 2018-01-05 00:00:00
|
||
type: "categories"
|
||
---
|
||
```
|
||
|
||
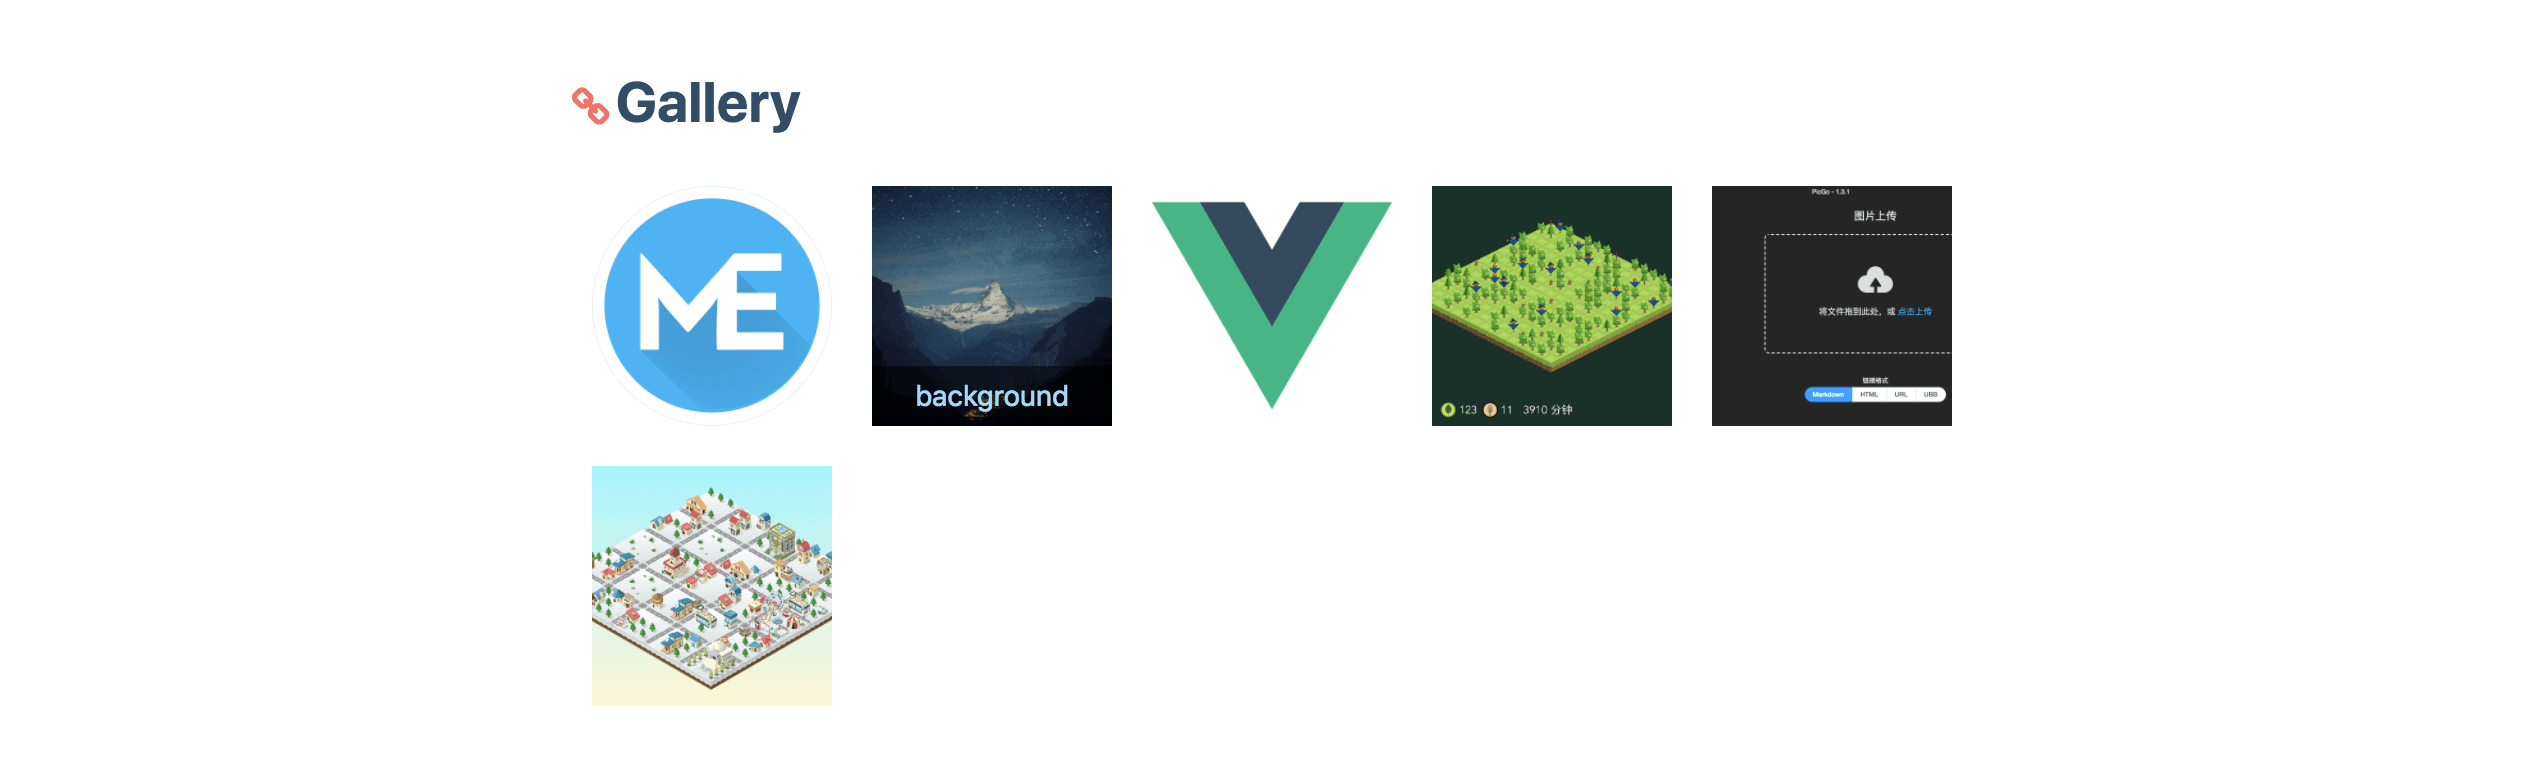
## 相冊
|
||
|
||
為你的博客創建一個相冊頁!
|
||
|
||
### 創建相冊頁
|
||
|
||
1. 前往你的 Hexo 博客的根目錄
|
||
|
||
2. 輸入`hexo new page gallery`
|
||
|
||
3. 你會找到`source/gallery/index.md`這個文件
|
||
|
||
4. 修改這個文件:
|
||
|
||
```markdown
|
||
---
|
||
title: Gallery
|
||
date: 2018-01-05 00:00:00
|
||
type: "gallery"
|
||
---
|
||
```
|
||
|
||
Butterfly 提供了一個叫做`gallery`的標籤,讓你能夠在 markdown 文件裏生成`gallery-item`。
|
||
|
||
修改你剛剛創建的`source/gallery/index.md`,並加上`gallery` 標籤。
|
||
|
||
`gallery img-url [title]`
|
||
|
||
例子:
|
||
|
||
```markdown
|
||
---
|
||
title: Gallery
|
||
date: 2018-01-05 00:00:00
|
||
type: "gallery"
|
||
---
|
||
{% gallery https://ws1.sinaimg.cn/large/8700af19gy1fp5i6o2vghj20ea0eajse melody %}
|
||
{% gallery https://user-images.githubusercontent.com/12621342/37325500-23e8f77c-26c9-11e8-8e24-eb4346f1fff5.png background %}
|
||
{% gallery https://ws1.sinaimg.cn/large/8700af19gy1fp5i64zaxqj20b40b474b demo1 %}
|
||
{% gallery https://ws1.sinaimg.cn/large/8700af19ly1fn2h26q32uj21120kudqq demo2 %}
|
||
{% gallery https://ws1.sinaimg.cn/large/8700af19ly1fnhdaimi40j218g0p0dic demo3 %}
|
||
{% gallery https://ws1.sinaimg.cn/large/8700af19ly1fn2i5kjh2pj21120kuncd %}
|
||
```
|
||
> gallery-item 也擁有 fancybox 的效果!
|
||
|
||
|
||
|
||
## 友情鏈接
|
||
|
||
為你的博客創建一個友情鏈接!
|
||
|
||
### 創建友情鏈接頁面
|
||
|
||
1. 前往你的 Hexo 博客的根目錄
|
||
2. 輸入 `hexo new page link`
|
||
3. 你會找到`source/link/index.md`這個文件
|
||
4. 修改這個文件:
|
||
|
||
```markdown
|
||
---
|
||
title: 友情鏈接
|
||
date: 2018-06-07 22:17:49
|
||
type: "link"
|
||
---
|
||
```
|
||
|
||
### 友情鏈接添加
|
||
|
||
在Hexo博客目錄中的`source/_data`,創建一個文件`link.yml`
|
||
|
||
```yml
|
||
class:
|
||
class_name: 友情鏈接
|
||
link_list:
|
||
1:
|
||
name: xxx
|
||
link: https://blog.xxx.com
|
||
avatar: https://cdn.xxxxx.top/avatar.png
|
||
descr: xxxxxxx
|
||
2:
|
||
name: xxxxxx
|
||
link: https://www.xxxxxxcn/
|
||
avatar: https://xxxxx/avatar.png
|
||
descr: xxxxxxx
|
||
|
||
class2:
|
||
class_name: 鏈接無效
|
||
link_list:
|
||
1:
|
||
name: 夢xxx
|
||
link: https://blog.xxx.com
|
||
avatar: https://xxxx/avatar.png
|
||
descr: xxxx
|
||
2:
|
||
name: xx
|
||
link: https://www.axxxx.cn/
|
||
avatar: https://x
|
||
descr: xx
|
||
```
|
||
|
||
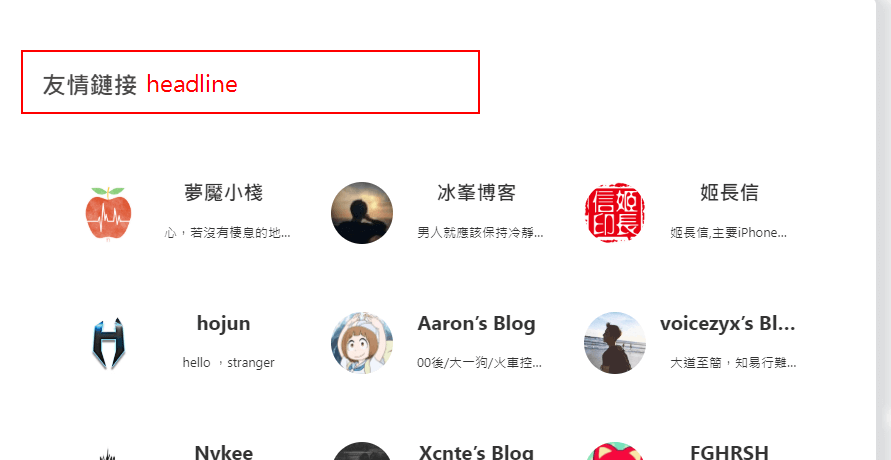
### 友情鏈接界面設置
|
||
|
||
需要添加友情鏈接,可以在`Butterfly.yml`配置
|
||
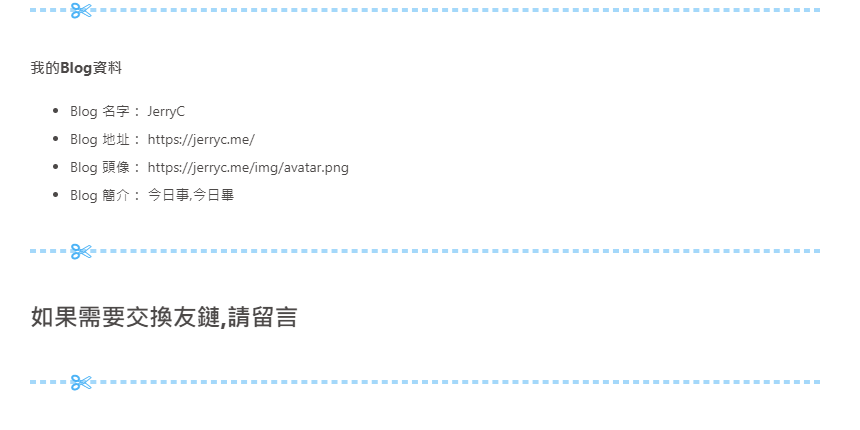
可在友情鏈接上寫上自己的個人資料,方便其他人添加。
|
||
|
||
```yaml
|
||
Flink:
|
||
headline: 友情鏈接
|
||
info_headline: 我的Blog資料
|
||
name: Blog 名字: JerryC
|
||
address: Blog 地址: https://jerryc.me/
|
||
avatar: Blog 頭像: https://jerryc.me/img/avatar.png
|
||
info: Blog 簡介: 今日事,今日畢
|
||
comment: 如果需要交換友鏈,請留言
|
||
```
|
||
|
||
|
||
|
||
|
||
# 第三方支持
|
||
|
||
## 評論
|
||
|
||
>只能選擇一個評論服務商
|
||
|
||
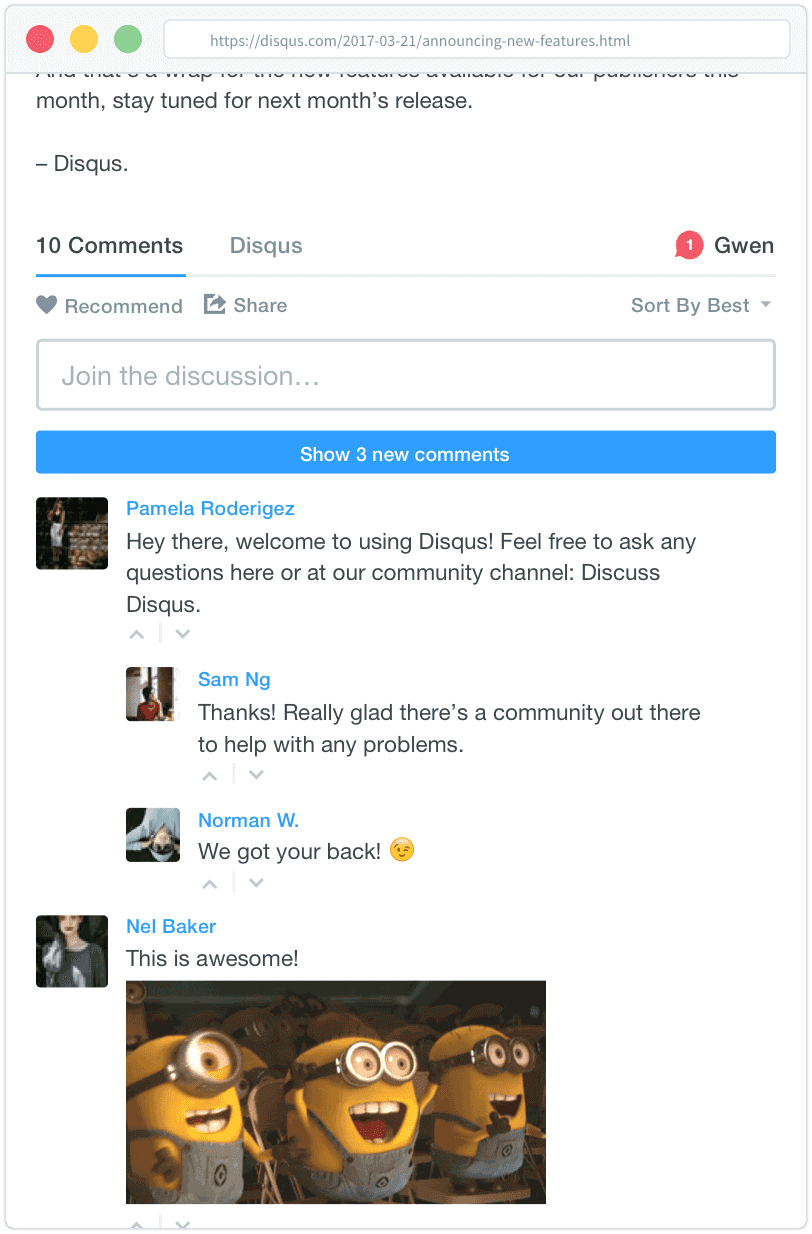
### Disqus
|
||
|
||
註冊 [disqus](https://disqus.com/),配置你自己的 disqus,然後在`Butterfly`裏開啟它。
|
||
|
||
配置`butterfly.yml`
|
||
|
||
```yaml
|
||
disqus:
|
||
enable: true # or false
|
||
shortname: 你的disqus的 short-name
|
||
```
|
||
|
||
|
||
|
||
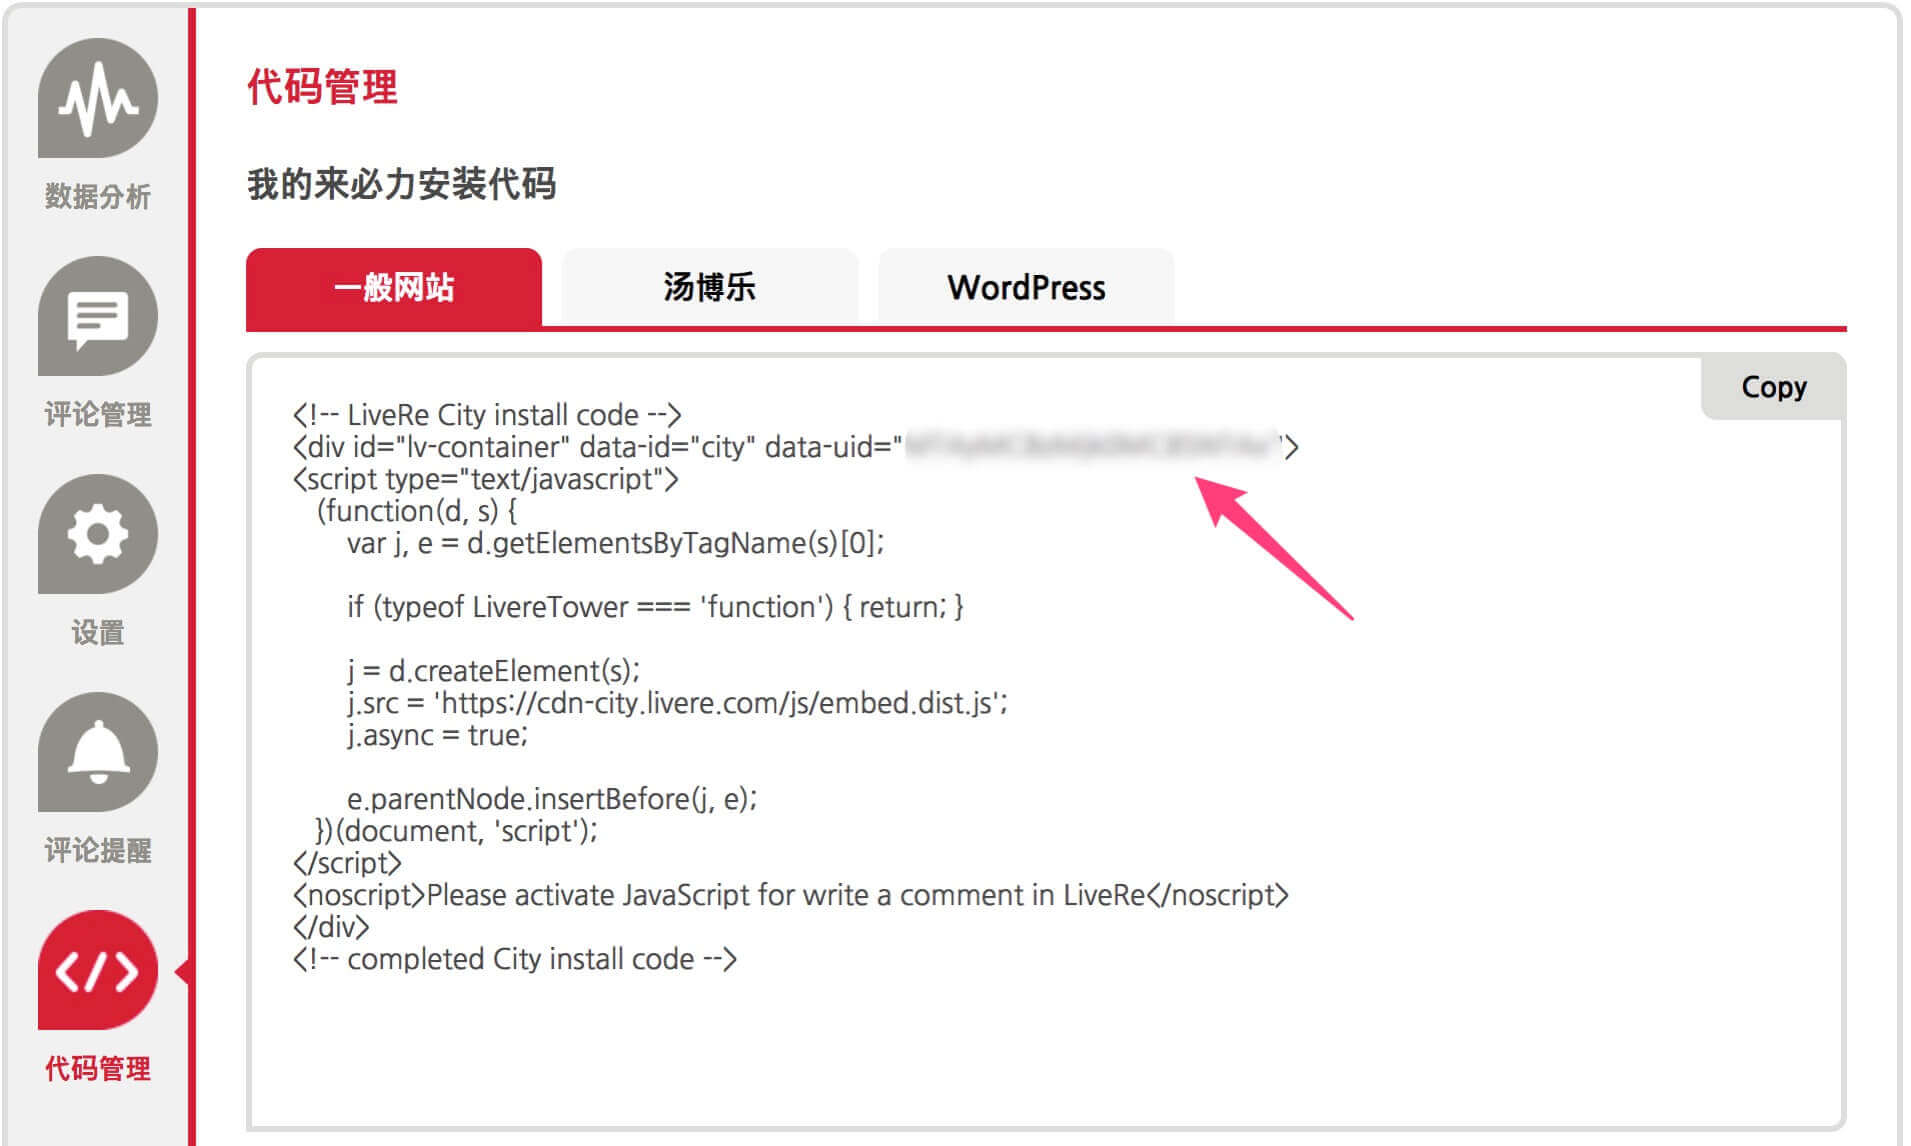
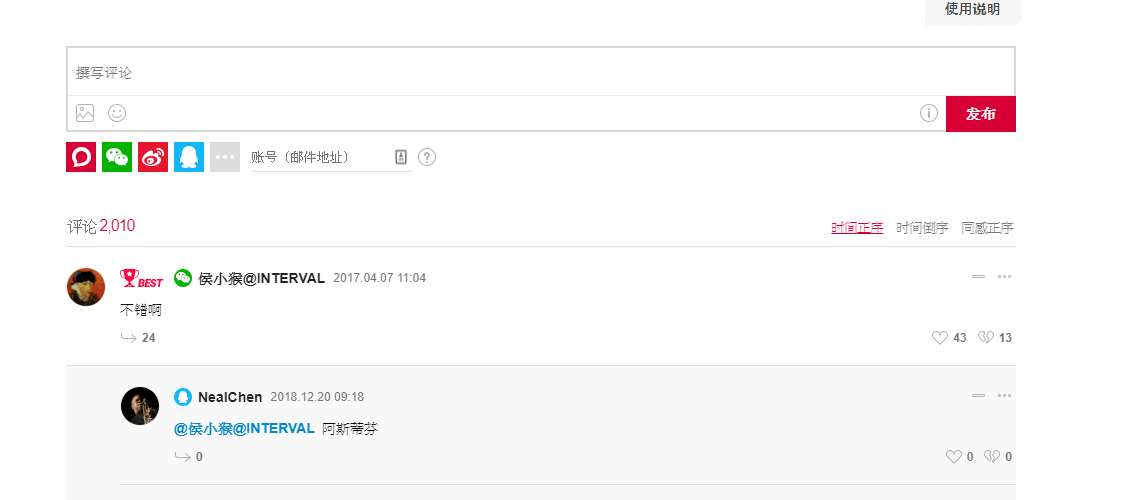
### Laibili(來必力)
|
||
|
||
註冊[來必力](http://www.laibili.com.cn/),配置你自己的來必力設置,然後在`Butterfly`裏開啟它。
|
||
|
||
配置`butterfly.yml`
|
||
|
||
```yaml
|
||
laibili:
|
||
enable: true # or false
|
||
uid: 你的laibili的uid
|
||
```
|
||
|
||
laibili 的 uid 你能在這裏找到:
|
||
|
||
|
||
|
||
|
||
|
||
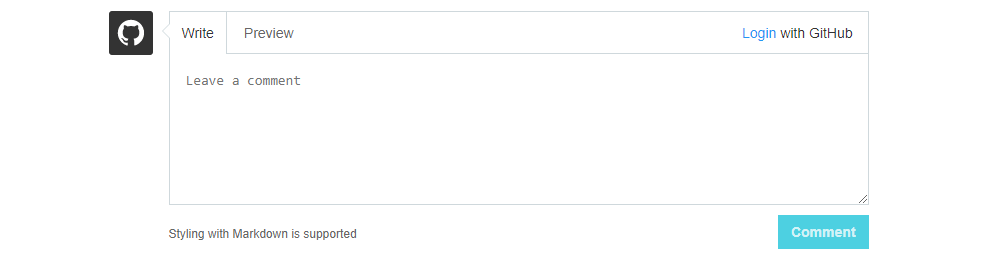
### Gitment
|
||
|
||
遵循 [gitment](https://github.com/imsun/gitment)的指示去獲取你的 github Oauth 應用的 client id 和 secret 值。
|
||
|
||
然後配置`butterfly.yml`:
|
||
|
||
```yaml
|
||
gitment:
|
||
enable: true # or false
|
||
owner: 你的github用户名
|
||
repo: 你的github倉庫
|
||
client_id: 你的client id
|
||
client_secret: 你的client secret
|
||
```
|
||
|
||
|
||
|
||
### Gitalk
|
||
|
||
遵循 [gitalk](https://github.com/gitalk/gitalk)的指示去獲取你的 github Oauth 應用的 client id 和 secret 值。以及查看它的相關配置説明。
|
||
|
||
然後配置`butterfly.yml`:
|
||
|
||
```yaml
|
||
gitalk:
|
||
enable: true
|
||
client_id: 你的client id
|
||
client_secret: 你的client secret
|
||
repo: 你的github倉庫
|
||
owner: 你的github用户名
|
||
admin: 該倉庫的擁有者或協作者
|
||
```
|
||
|
||

|
||
|
||
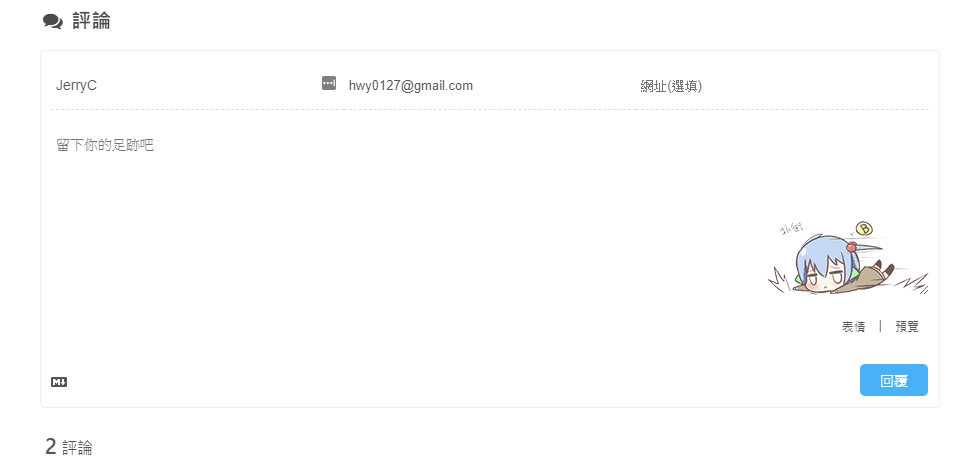
### Valine
|
||
|
||
遵循 [Valine](https://github.com/xCss/Valine)的指示去配置你的 LeanCloud 應用。以及查看相應的配置説明。
|
||
|
||
然後配置`butterfly.yml`:
|
||
|
||
```yaml
|
||
valine:
|
||
enable: false # if you want use valine,please set this value is true
|
||
appId: # leancloud application app id
|
||
appKey: # leancloud application app key
|
||
notify: false # valine mail notify (true/false) https://github.com/xCss/Valine/wiki
|
||
verify: false # valine verify code (true/false)
|
||
pageSize: 10 # comment list page size
|
||
avatar: monsterid # gravatar style https://valine.js.org/#/avatar
|
||
lang: en # i18n: zh-cn/en/tw
|
||
placeholder: Please leave your footprints # valine comment input placeholder(like: Please leave your footprints )
|
||
guest_info: nick,mail,link #valine comment header inf
|
||
```
|
||
|
||
|
||
|
||
## 分享
|
||
|
||
> 只能選擇一個分享服務商
|
||
|
||
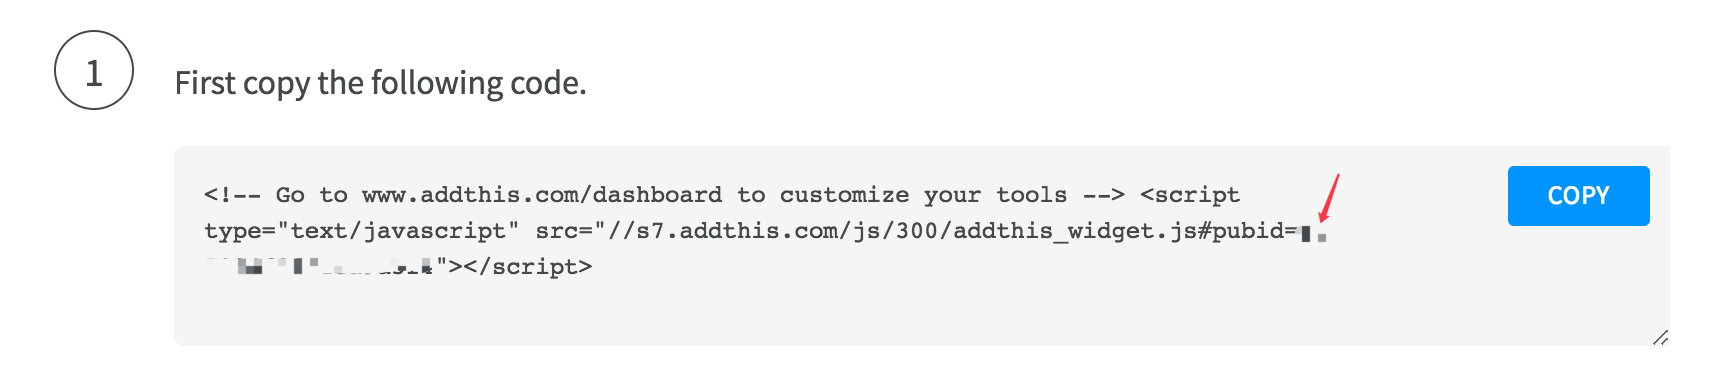
### AddThis
|
||
|
||
> 找到你的 pub-id
|
||
|
||
|
||
|
||
配置`butterfly.yml`
|
||
|
||
```yaml
|
||
addThis:
|
||
enable: true # or false
|
||
pubid: 你的pub-id
|
||
```
|
||
|
||
### Sharejs
|
||
|
||
如果你不知道 [sharejs](https://github.com/overtrue/share.js/),看看它的説明。
|
||
|
||
配置`butterfly.yml`
|
||
|
||
```yaml
|
||
sharejs:
|
||
enable: true
|
||
sites: facebook,twitter,wechat,weibo,qq #想要顯示的內容
|
||
```
|
||
|
||

|
||
|
||
### Addtoany
|
||
|
||
可以到[addtoany](https://www.addtoany.com/)查看使用説明
|
||
|
||
```yaml
|
||
addtoany:
|
||
enable: false
|
||
item: # 顯示的內容
|
||
- facebook
|
||
- twitter
|
||
- wechat
|
||
- sina_weibo
|
||
- facebook_messenger
|
||
- email
|
||
- copy_link
|
||
```
|
||
|
||

|
||
|
||
## 搜索系統
|
||
|
||
### Algolia
|
||
|
||
1. 你需要安裝 [hexo-algolia](https://github.com/oncletom/hexo-algolia)或 [hexo-algoliasearch](https://github.com/LouisBarranqueiro/hexo-algoliasearch). 根據它們的説明文檔去做相應的配置。
|
||
|
||
2. 配置`butterfly.yml`
|
||
|
||
```yaml
|
||
algolia_search:
|
||
enable: true
|
||
hits:
|
||
per_page: 6
|
||
|
||
labels:
|
||
input_placeholder: Search for Posts
|
||
hits_empty: "We didn't find any results for the search: ${query}" # if there are no result
|
||
hits_stats: "${hits} results found in ${time} ms"
|
||
```
|
||
|
||
### 本地搜索
|
||
|
||
1. 你需要安裝 [hexo-generator-search](https://github.com/PaicHyperionDev/hexo-generator-search). 根據它的文檔去做相應配置。**注意格式只支持 xml**。
|
||
|
||
2. 配置`butterfly.yml`
|
||
|
||
```yaml
|
||
local_search:
|
||
enable: false
|
||
labels:
|
||
input_placeholder: Search for Posts
|
||
hits_empty: "We didn't find any results for the search: ${query}" # if there are no result
|
||
```
|
||
|
||
## 網站驗證
|
||
|
||
如果需要搜索引擎收錄網站,可能需要登錄對應搜索引擎的管理平台進行提交。
|
||
各自的驗證碼可從各自管理平台拿到
|
||
|
||
配置`butterfly.yml`
|
||
|
||
```yaml
|
||
# Google Webmaster tools verification setting
|
||
# See: https://www.google.com/webmasters/
|
||
google_site_verification:
|
||
|
||
# Bing Webmaster tools verification setting
|
||
# See: https://www.bing.com/webmaster/
|
||
bing_site_verification:
|
||
|
||
# Yandex Webmaster tools verification setting
|
||
# See: https://webmaster.yandex.ru/
|
||
yandex_site_verification:
|
||
|
||
# Baidu Webmaster tools verification setting
|
||
# See: https://ziyuan.baidu.com/site/
|
||
baidu_site_verification:
|
||
|
||
# 360 Webmaster tools verification setting
|
||
# see http://zhanzhang.so.com/
|
||
qihu_site_verification:
|
||
```
|
||
|
||
## 分析統計
|
||
|
||
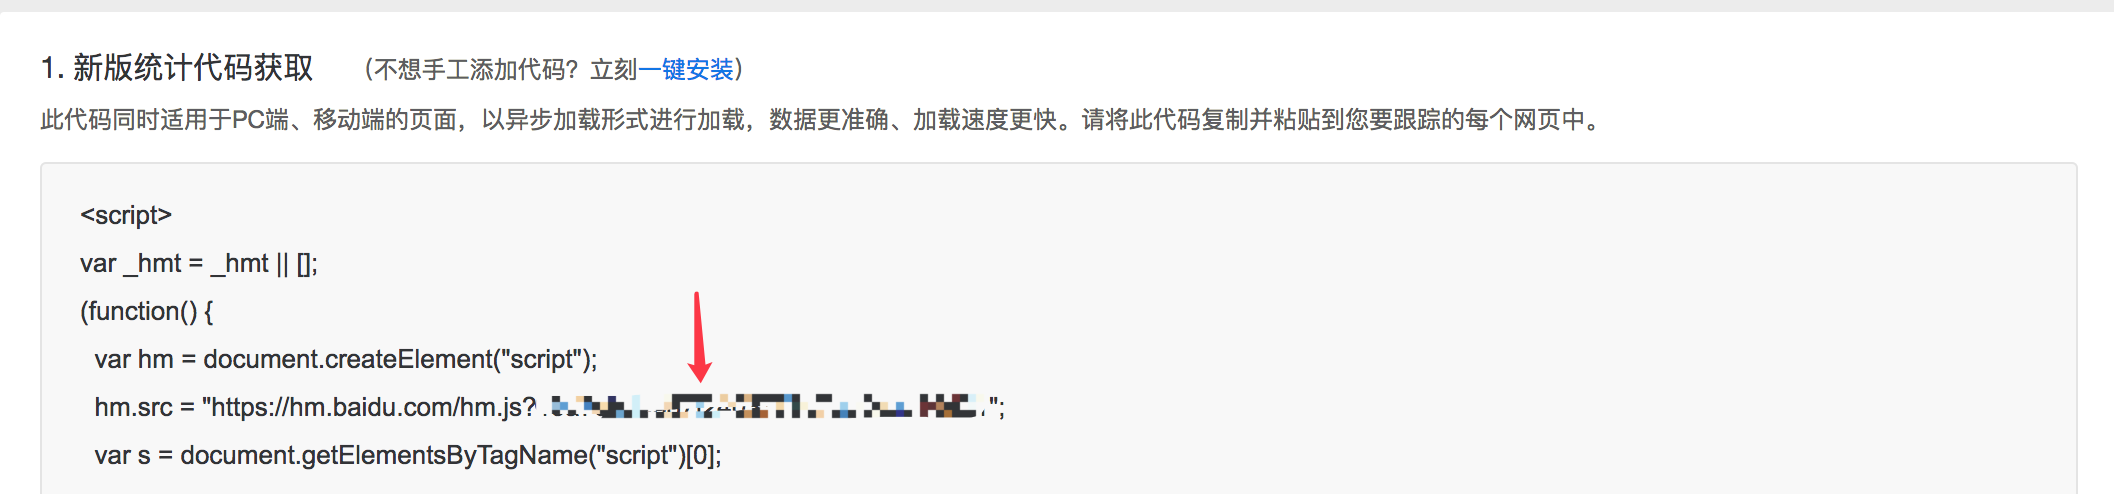
### 百度統計
|
||
|
||
1. 登錄百度統計的[官方網站](https://tongji.baidu.com/web/welcome/login)
|
||
|
||
2. 找到你百度統計的統計代碼
|
||
|
||
|
||
|
||
3\. 配置`butterfly.yml`
|
||
|
||
```yaml
|
||
baidu_analytics: 你的代碼
|
||
```
|
||
|
||
### 谷歌分析
|
||
|
||
1. 登錄谷歌分析的[官方網站](https://www.google.com/analytics/)
|
||
|
||
2. 找到你的谷歌分析的跟蹤 ID
|
||
|
||

|
||
|
||
3. 配置`butterfly.yml`
|
||
|
||
```yaml
|
||
google_analytics: 你的代碼 # 通常以`UA-`打頭
|
||
```
|
||
|
||
## 訪問人數 (UV 和 PV)
|
||
|
||
### busuanzi
|
||
|
||
訪問 busuanzi 的[官方網站](http://busuanzi.ibruce.info/)查看更多的介紹。
|
||
|
||
配置`butterfly.yml`
|
||
|
||
```yaml
|
||
busuanzi:
|
||
site_uv: true
|
||
site_pv: true
|
||
page_pv: true
|
||
```
|
||
|
||
|
||
|
||
|
||
|
||
## MathJax
|
||
|
||
> 建議使用 KaTex 獲得更好的效果,下文有介紹!
|
||
|
||
配置`butterfly.yml`:
|
||
|
||
```yaml
|
||
mathjax:
|
||
enable: true # or false
|
||
cdn: https://cdn.bootcss.com/mathjax/2.7.2/MathJax.js?config=TeX-AMS-MML_HTMLorMML # required
|
||
```
|
||
|
||
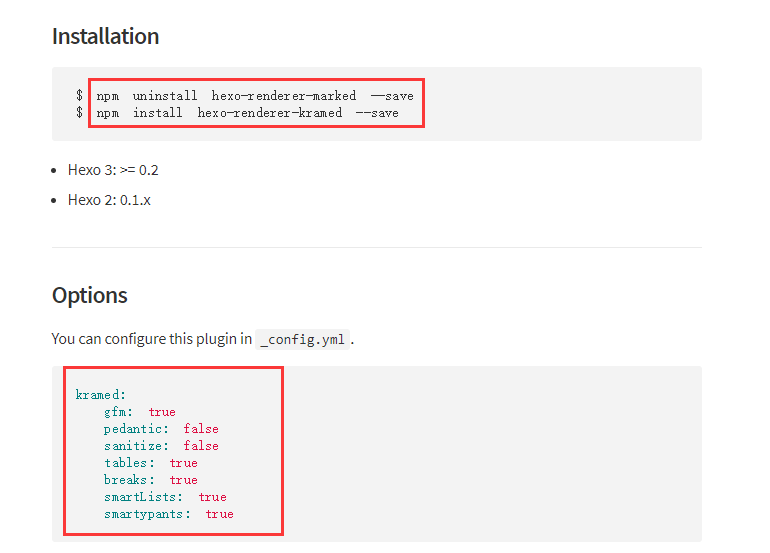
然後你需要修改一下默認的`markdown`渲染引擎來實現 MathJax 的效果。
|
||
|
||
查看: [hexo-renderer-kramed](https://www.npmjs.com/package/hexo-renderer-kramed)
|
||
|
||
以下操作在你 hexo 博客的目錄下 (**不是 Butterfly 的目錄!**):
|
||
|
||
|
||
|
||
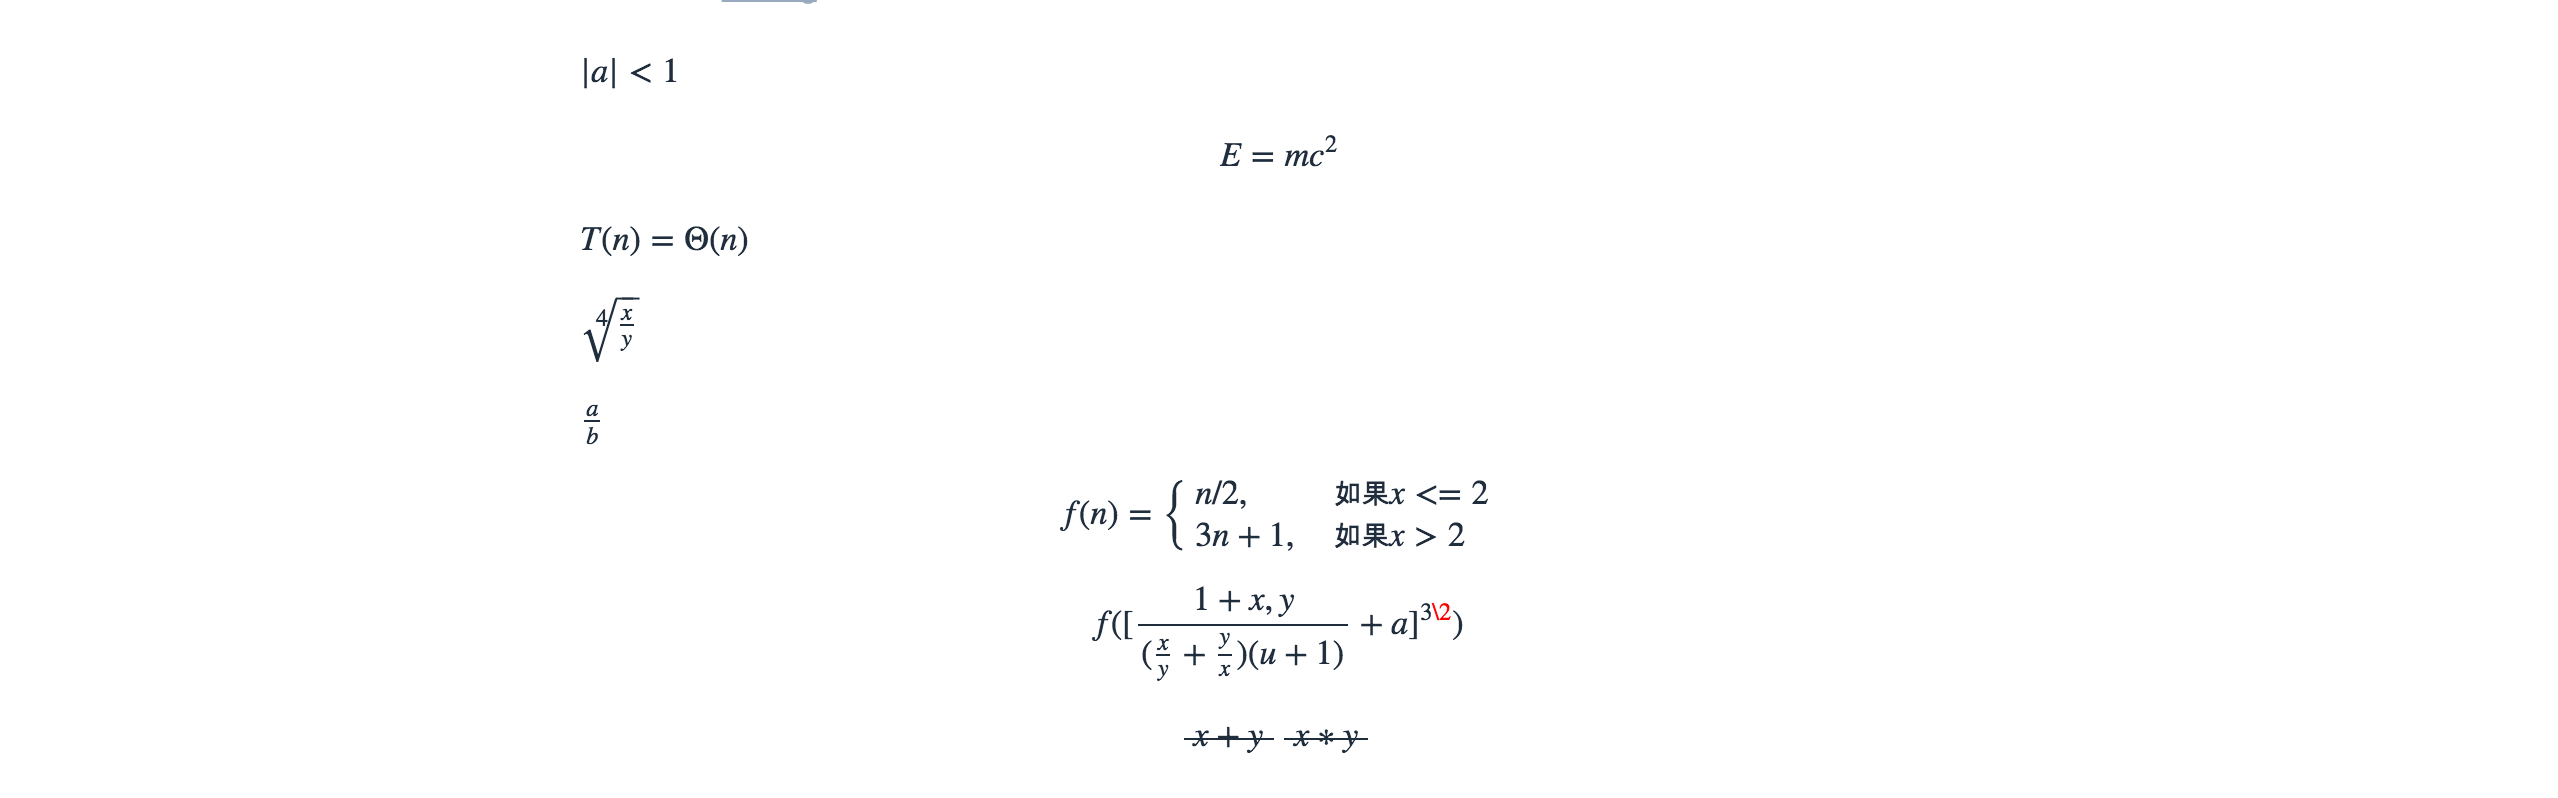
效果:
|
||
|
||
|
||
|
||
## KaTeX
|
||
|
||
首先禁用`MathJax`(如果你配置過 MathJax 的話),然後修改你的`butterfly.yml`以便加載`katex.min.css`:
|
||
|
||
```yaml
|
||
katex:
|
||
enable: true
|
||
cdn:
|
||
css: https://cdn.jsdelivr.net/npm/katex@latest/dist/katex.min.css
|
||
```
|
||
|
||
你不需要添加`katex.min.js`來渲染數學方程。相應的你需要卸載你之前的 hexo 的 markdown 渲染器以及`hexo-math`,然後安裝新的`hexo-renderer-markdown-it-plus`:
|
||
|
||
```yaml
|
||
# 替換 `hexo-renderer-kramed` 或者 `hexo-renderer-marked` 等hexo的markdown渲染器
|
||
# 你可以在你的package.json裏找到hexo的markdwon渲染器,並將其卸載
|
||
npm un hexo-renderer-marked --save
|
||
|
||
# or
|
||
|
||
npm un hexo-renderer-kramed --save
|
||
|
||
# 卸載 `hexo-math`
|
||
npm un hexo-math --save
|
||
|
||
# 然後安裝 `hexo-renderer-markdown-it-plus`
|
||
npm i @upupming/hexo-renderer-markdown-it-plus --save
|
||
```
|
||
|
||
注意到 [`hexo-renderer-markdown-it-plus`](https://github.com/CHENXCHEN/hexo-renderer-markdown-it-plus)已經無人持續維護, 所以我們使用 [`@upupming/hexo-renderer-markdown-it-plus`](https://github.com/upupming/hexo-renderer-markdown-it-plus)。 這份 fork 的代碼使用了 [`@neilsustc/markdown-it-katex`](https://github.com/yzhang-gh/markdown-it-katex)同時它也是 VSCode 的插件 [Markdown All in One](https://github.com/yzhang-gh/vscode-markdown)所使用的, 所以我們可以獲得最新的 KaTex 功能例如 `\tag{}`。
|
||
|
||
你還可以通過 [`@neilsustc/markdown-it-katex`](https://github.com/yzhang-gh/markdown-it-katex)控制 KaTeX 的設置,所有可配置的選項參見 https://katex.org/docs/options.html。 比如你想要禁用掉 KaTeX 在命令行上輸出的宂長的警告信息,你可以在根目錄的 `_config.yml` 中使用下面的配置將 `strict` 設置為 false:
|
||
|
||
```yaml
|
||
markdown_it_plus:
|
||
plugins:
|
||
- plugin:
|
||
name: '@neilsustc/markdown-it-katex'
|
||
enable: true
|
||
options:
|
||
strict: false
|
||
```
|
||
|
||
當然,你還可以利用這個特性來定義一些自己常用的 `macros`。
|
||
|
||
因為 KaTeX 更快更輕量,因此沒有 MathJax 的功能多(比如右鍵菜單)。為那些使用 MathJax 的用户,我們也為 KaTeX 默認添加了 [_Copy As TeX Code_](https://github.com/upupming/katex-copytex)的功能。
|
||
|
||
|
||
|
||
## 特效
|
||
|
||
### 打字效果
|
||
|
||
打字效果[activate-power-mode](https://github.com/disjukr/activate-power-mode)
|
||
|
||
配置`butterfly.yml`
|
||
|
||
```yaml
|
||
activate_power_mode:
|
||
enable: true
|
||
```
|
||
|
||
|
||
|
||
### 靜止彩帶
|
||
|
||
好看的彩帶背景,可設置每次刷新更換彩帶,或者每次點擊更換彩帶
|
||
|
||
配置`butterfly.yml`
|
||
|
||
```yaml
|
||
canvas_ribbon:
|
||
enable: false
|
||
size: 150
|
||
alpha: 0.6
|
||
zIndex: -1
|
||
click_to_change: false #設置是否每次點擊都更換彩帶
|
||
```
|
||
|
||
相關配置可查看[canvas_ribbon](https://github.com/hustcc/ribbon.js)
|
||
|
||
### 動態彩帶
|
||
|
||
好看的彩帶背景,會飄動
|
||
|
||
配置`butterfly.yml`
|
||
|
||
```yaml
|
||
canvas_ribbon_piao:
|
||
enable: true
|
||
```
|
||
|
||

|
||
|
||
### 煙花效果
|
||
|
||
配置`butterfly.yml`
|
||
|
||
```yaml
|
||
fireworks:
|
||
enable: true
|
||
```
|
||

|
||
|
||
## PWA
|
||
|
||
要為`Butterfly`配上 PWA 特性, 你需要如下幾個步驟:
|
||
|
||
1. 打開 hexo 工作目錄
|
||
|
||
2. `npm install hexo-offline --save` 或者 `yarn add hexo-offline`
|
||
|
||
3. 修改`_config.yml` 在站點`_config.yml`中增加以下內容。
|
||
|
||
```yaml
|
||
# offline config passed to sw-precache.
|
||
offline:
|
||
maximumFileSizeToCacheInBytes: 10485760 # 緩存的最大文件大小,以字節為單位
|
||
staticFileGlobs:
|
||
- public/**/*.{js,html,css,png,jpg,gif,svg,webp,eot,ttf,woff,woff2}
|
||
# 靜態文件合集,如果你的站點使用了例如webp格式的文件,請將文件類型添加進去。
|
||
stripPrefix: public
|
||
verbose: true
|
||
runtimeCaching:
|
||
# CDNs - should be cacheFirst, since they should be used specific versions so should not change
|
||
- urlPattern: /* # 如果你需要加載CDN資源,請配置該選項,如果沒有,可以不配置。
|
||
handler: cacheFirst
|
||
options:
|
||
origin: your_websie_url # 可替換成你的 url
|
||
```
|
||
|
||
更多內容請查看 [hexo-offline](https://github.com/JLHwung/hexo-offline)的官方文檔
|
||
|
||
4. 在`butterfly.yml`中開啟 pwa 選項。
|
||
|
||
```yaml
|
||
pwa:
|
||
enable: true
|
||
manifest: /img/pwa/manifest.json
|
||
theme_color: "#fff"
|
||
apple_touch_icon: /img/pwa/apple-touch-icon.png
|
||
favicon_32_32: /img/pwa/32.png
|
||
favicon_16_16: /img/pwa/16.png
|
||
mask_icon: /img/pwa/safari-pinned-tab.svg
|
||
```
|
||
|
||
5. 在創建`source/`目錄中創建`manifest.json`文件。
|
||
|
||
```json
|
||
{
|
||
"name": "string", //應用全稱
|
||
"short_name": "Junzhou", //應用簡稱
|
||
"theme_color": "#49b1f5", //匹配瀏覽器的地址欄顏色
|
||
"background_color": "#49b1f5",//加載應用時的背景色
|
||
"display": "standalone",//首選顯示模式 其他選項有:fullscreen,minimal-ui,browser
|
||
"scope": "/",
|
||
"start_url": "/",
|
||
"icons": [ //該數組指定icons圖標參數,用來時適配不同設備(需為png,至少包含一個192px*192px的圖標)
|
||
{
|
||
"src": "images/pwaicons/36.png", //圖標文件的目錄,需在source/目錄下自行創建。
|
||
"sizes": "36x36",
|
||
"type": "image/png"
|
||
},
|
||
{
|
||
"src": "images/pwaicons/48.png",
|
||
"sizes": "48x48",
|
||
"type": "image/png"
|
||
},
|
||
{
|
||
"src": "images/pwaicons/72.png",
|
||
"sizes": "72x72",
|
||
"type": "image/png"
|
||
},
|
||
{
|
||
"src": "images/pwaicons/96.png",
|
||
"sizes": "96x96",
|
||
"type": "image/png"
|
||
},
|
||
{
|
||
"src": "images/pwaicons/144.png",
|
||
"sizes": "144x144",
|
||
"type": "image/png"
|
||
},
|
||
{
|
||
"src": "images/pwaicons/192.png",
|
||
"sizes": "192x192",
|
||
"type": "image/png"
|
||
},
|
||
{
|
||
"src": "images/pwaicons/512.png",
|
||
"sizes": "512x512",
|
||
"type": "image/png"
|
||
}
|
||
],
|
||
"splash_pages": null //配置自定義啟動動畫。
|
||
}
|
||
```
|
||
|
||
你也可以通過 [Web App Manifest](https://app-manifest.firebaseapp.com/)快速創建`manifest.json`。(Web App Manifest 要求至少包含一個 512*512 像素的圖標)
|
||
|
||
6. 可以通過`Chrome`插件`Lighthouse`檢查 PWA 配置是否生效以及配置是否正確。
|
||
|
||
- 打開博客頁面
|
||
- 啟動`Lighthouse`插件 (`Lighthouse`插件要求至少包含一個 512*512 像素的圖標)
|
||
|
||
關於 PWA(漸進式增強 Web 應用)的更多內容請參閲 [Google Tools for Web Developers](https://developers.google.com/web/tools/lighthouse/audits/address-bar)
|
||
|
||
## 字數統計
|
||
|
||
要為`Butterfly`配上字數統計特性, 你需要如下幾個步驟:
|
||
|
||
1. 打開 hexo 工作目錄
|
||
|
||
2. `npm install hexo-wordcount --save` or `yarn add hexo-wordcount`
|
||
|
||
3. 配置`butterfly.yml`:
|
||
|
||
```yaml
|
||
wordcount:
|
||
enable: true
|
||
```
|
||
|
||
|
||
|
||
## 文章置頂
|
||
|
||
要為你一些文章置頂,你需要如下步驟:
|
||
|
||
1. 打開 hexo 工作目錄
|
||
2. `npm uninstall hexo-generator-index --save` 然後 `npm install hexo-generator-index-pin-top --save`
|
||
3. 你要在文章的`front-matter`區域裏添加`top: True`屬性來把這篇文章置頂。
|
||
4. 你可以參考 [hexo-generator-index-pin-top](https://github.com/netcan/hexo-generator-index-pin-top)這個倉庫來了解更多細節。
|
||
|
||
舉個例子:
|
||
|
||
你的某篇文章開頭如下:
|
||
|
||
```markdown
|
||
title: xxxx
|
||
tags:
|
||
- xxx
|
||
date: 2018-08-08 08:08:08
|
||
---
|
||
// ....
|
||
```
|
||
|
||
現在把`top: True`加進去:
|
||
|
||
```markdown
|
||
title: xxxx
|
||
tags:
|
||
- xxx
|
||
date: 2018-08-08 08:08:08
|
||
top: True
|
||
---
|
||
// ....
|
||
``` |